reference-image, l
(article, Beth Howard)
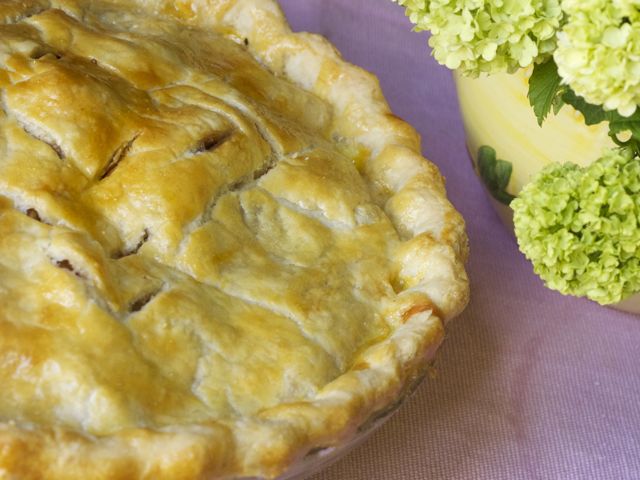
[%pageBreakSettings nobreak=true][%adInjectionSettings noInject=true] Of all the baked goods in America, pie is one of the oldest, most traditional, and most loved. It may also be the most feared. We adore eating it, but we grumble about making it. The dough is always too tricky, or never pretty enough, or even dispensed with altogether. [[block(sidebar). h1.Featured recipe]] But pie is not about perfection. It’s about improvisation. It's about having a tactile experience. Above all, it's about sharing something with others that you made yourself. Here are eight pie-making tips to help demystify this popular dessert. [[list(culinate8). #(clear n1). Get hands-on with your dough. To moisten the dough, most pie recipes tell you to add a set number of tablespoons of ice water, one tedious spoonful at a time. But your flour will contain more or less moisture depending on how humid the weather is that day. So put that measuring spoon aside, get your hands in the dough, and feel how much water your dough needs. Pour in the water in stages, lightly working it into the flour — try to “fluff” the dough — until there's no dry stuff left on the bottom of the bowl. Don't sweat having all your ingredients chilled to the nth degree. Their temperature matters less than having ample water and maintaining a light touch when mixing your dough. #(clear n2). [%image reference-image float='clear right' width=350 caption="Beth Howard's apple pie isn't fussy, just tasty."] Take control of the rolling pin. Rolling the dough into the round shape of your pie plate doesn’t happen automatically; you have to steer and coax it into shape. To do this, don’t just roll in straight motions back and forth across the dough. Keeping your rolling pin on the crust edges, where you usually have extra thickness to work with, push in a semi-circular direction to move the dough where you want it to go. You can also rotate the dough on your rolling surface, spinning it until the place you want to roll is in front of you. #(clear n3). Get floury, but stay tidy. If your dough is sticking to the table or to your pin, congratulations. It means you didn’t overwork your dough and you have preserved the globs of fat that will ensure a flaky crust. Still, you don't want to leave your dough on the countertop. So sprinkle your rolling surface with flour, both under and on top of your dough. You don't need much — just what you can pick up with your fingers — but sprinkle as often as you need. Flip your dough over once or twice during the rolling process to ensure it’s not stuck to the table. Another key to rolling ease is keeping your work surface clean. After rolling out one crust, make sure you start with a pristine surface before you start on the next. And take a minute to scrape the gunk off your rolling pin while you’re at it. #(clear n4). Safe passage. One of the stages of pie-making that sends bakers running from the kitchen — or, worse, to the store for premade crust — is getting the dough into the pie plate without breaking it. First of all, if the dough breaks, it's not a big deal. No one will see the bottom crust once you fill it. And if the top crust cracks, just grab a cookie cutter or a knife and make dough shapes to arrange on top. The result will be a one-of-a-kind artwork that everyone will think is not only creative but intentional. (By the way, if your dough does crack, it may be that you didn’t add enough water to it.) Still, if getting the dough into the plate in one piece is your ultimate goal, here’s what to do: Fold the dough in half. Gently and patiently, drag it — without lifting it off the work surface — over to your pie dish. (Move your dish closer for less travel distance.) You can also use your rolling pin, laying the dough across the length of the pin to help carry it to your dish. Patience really is a virtue. Don’t rush it. Take your time. And if you've got a bench scraper, use it; it's my secret weapon for prying sticky dough off the counter. #(clear n5). Do the tuck-and-pinch. You've got all your pie components safely into the pie plate, but now how do you get the top and bottom crusts to come together? And you do need to get those pie-crust edges tightly together, because if you don't, your pie's bubbling juices will ooze out and leave a huge mess on the bottom of your oven. To make a fluted edge on your crust, trim the crust edges with scissors to within one inch of the pie-plate rim. Then, starting on the rim opposite to you, in an overhand motion, holding both the top and bottom edges together, turn the dough under until the rolled edge sits on the rim of the pie plate. Move the pie plate around as you go. Run your finger around the bottom of the plate’s rim to make sure there’s no excess dough hanging off. Now, with the thumb and forefinger simulating a pinch gesture in one hand and your index finger in the other, push the side of the index finger in between the thumb and forefinger. With opposing force, pinch until the dough rises up in a pointy groove. Pick up your set of fingers and repeat, moving around the rim (turning the pie plate as you go) until the grooves become a full-fledged fluted edge. Gorgeous. (But remember: pie is not about perfection, so if your edges look uneven, fine. You want your pie to look homemade.) #(clear n6). Get heavy. Blind baking is a pain. I love eating cream pies, but I dread making them because of the extra steps involved. It took some practice before I could get my blind-baked crusts to stop shrinking (and thus rattling around in the pie plate) or coming out soggy. Once you've lined the pie plate with your dough and fluted the edges (cream pies have a single crust, with no top crust), prick the bottom and sides of the dough with a fork, cover it with foil, and then fill the entire pie dish with weights. For the weights, raid your tool box and use a pile of metal nuts and washers, or use all that change you’ve been collecting. Uncooked beans or rice work well, too. You need enough weight to hold the dough in place as it bakes. After the edges have browned, remove the weights and foil and then bake for another few minutes to get the bottom of the crust to brown. #(clear n7). Through thick and thin. Fruit filling can be as temperamental as pie dough. Sometimes it comes out too runny, liquid pouring all over when you cut into the pie; other times it can be so thick and gelatinous, the filling resembles rubber. To help resolve this, know your fruit. For example, peaches at the height of juicy ripeness require a superglue-like thickener, such as tapioca. Blueberries lie somewhere in the middle ground, where a medium-strength agent like cornstarch is key. And apples, that sturdy, starchy fruit, generally need only a handful of flour to achieve textural balance. #(clear n8). Good enough to eat. How do you tell when your pie is done? It’s not always as easy as sticking a knife in it, but almost. Baking guidelines for a double-crust fruit pie include starting with a very hot oven (425 degrees) to set the crust for about 20 minutes, then finishing off the filling at a lower temperature (375 degrees) for another 20 or 30 minutes. (Turning down the oven also helps keep your crust edges from burning.) You’ll know your double-crust pie is ready when you see the filling bubbling up through the vent holes of your top crust. But in the case of the all-American apple pie, you'll also want to test the softness of the filling with a knife. A little resistance to the knife means the fruit is just right. The apples will keep cooking after the pie is out of the oven, so it’s safer to err on the side of underdone. As my pie mentor once told me, “You don’t want to eat applesauce.” ]] p(bio). A self-proclaimed "pie evangelist," Beth Howard is writing a memoir that will be published in 2012. She lives in Iowa and blogs at The World Needs More Pie.
reference-image, l